Step by step how can laying tiles..
Step 1 :
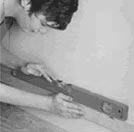
To ensure that you have a level base from which to commence tiling. Set a batten horisontally one tile above the lowest point of fixing. Use a spirit level to make sure that the batten is set level.
Step 2 :
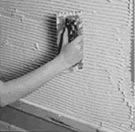
Start tilling by spreading tile adhesive with a notched trowel. Not more than a square metre should be covered with adhesive at one time. Set the first tile at the middle and work out on either sied to ensure that the cut are eual at each end.
Step 3 :
Place tiles into adhesive bed using a firm twisting movement so that there is a good, even contact background. To ensure that the tiles are even joined use tile spacer pegs.
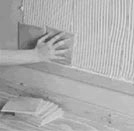
Step 4 :
Before fixing border and profile tiles check how the joints bond. If they are a different width to the main field tiles, staggered joints are preferable and will look less obvious, Use tile spacer pags to ensure even joints.
Step 5 :
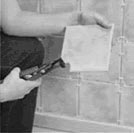
Cutting curved and irregular shapes, to fit around pipework for example, mark the shape on the tile and by using tile nippers create the shape you need, Finish off using a tile file to smooth any rough edges. It is recommended that googles are worn during cutting.
Step 6 :
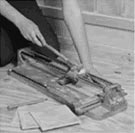
Tiles can be cut using a tile cutting machine. This makes cutting easy and accurate. Tile cutters are available at all good tile outlets and for hire from tool hire centers.
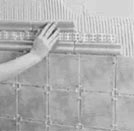
Step 7 :
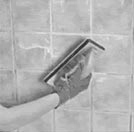
When the tile adhesive is dry, fill the joints with grout. This should be worked into the joint flush up to the tile edge. Remove any excess grout with a damp sponge before it dries. There are tools available to assist spreading the grout.
Step 8 :
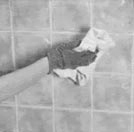
Clean off the tile grout residue by polishing the tiles with a clean dry cloth